
Subtotal ₨ 0
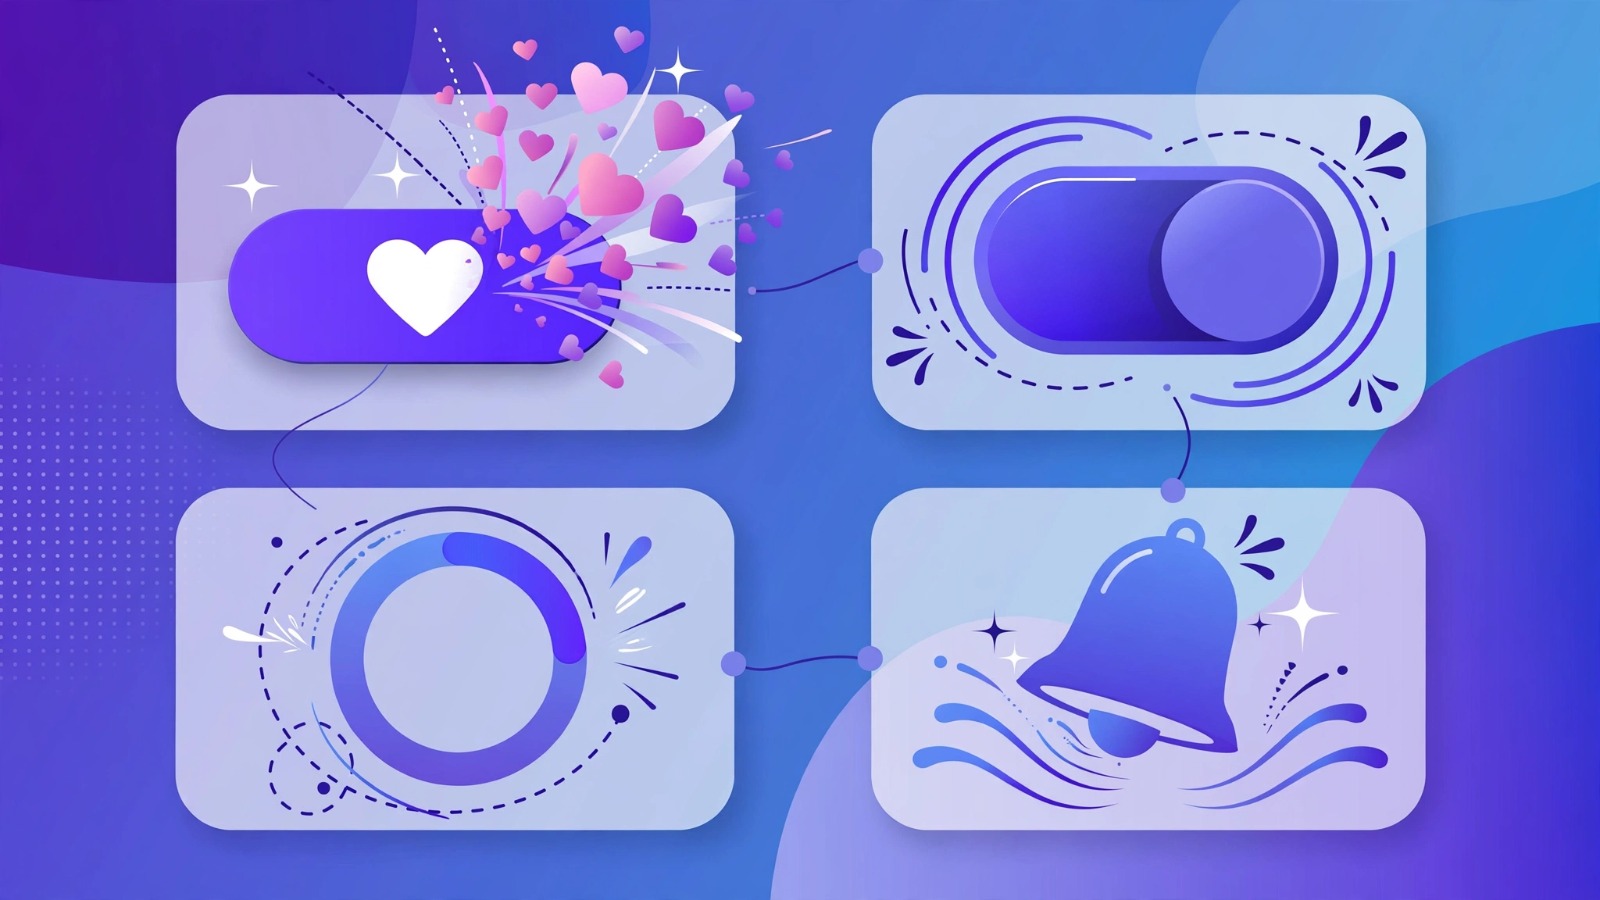
Microinteractions are the secret ingredient that makes an app feel alive. If you are wondering how to get started with microinteractions in UI design, you are in the right place. These small, functional animations are more than just decoration, they guide users, provide instant feedback, and build trust in your product.
At SSDSOL, we believe great design lives in the details. This beginner guide will break down exactly how to get started with microinteractions in UI design without getting overwhelmed.
If you want to learn how to get started with microinteractions in UI design, this guide covers the exact framework we use at SSDSOL.
What Are Microinteractions in UI Design?
A microinteraction is a single-purpose, small moment in your product designed to accomplish one task. Think of the heart bursting when you like a post on Instagram, or a button changing to a checkmark after you submit a form.
Unlike big animations, microinteractions are invisible when done well. Users don’t think “what a great animation,” they just feel that the interface is intuitive and responsive. Learning what are microinteractions is the first step to improving your entire UX.
Understanding this concept is the foundation of how to get started with microinteractions in UI design for any beginner.
The 4 Parts of a Microinteraction (Core Structure)
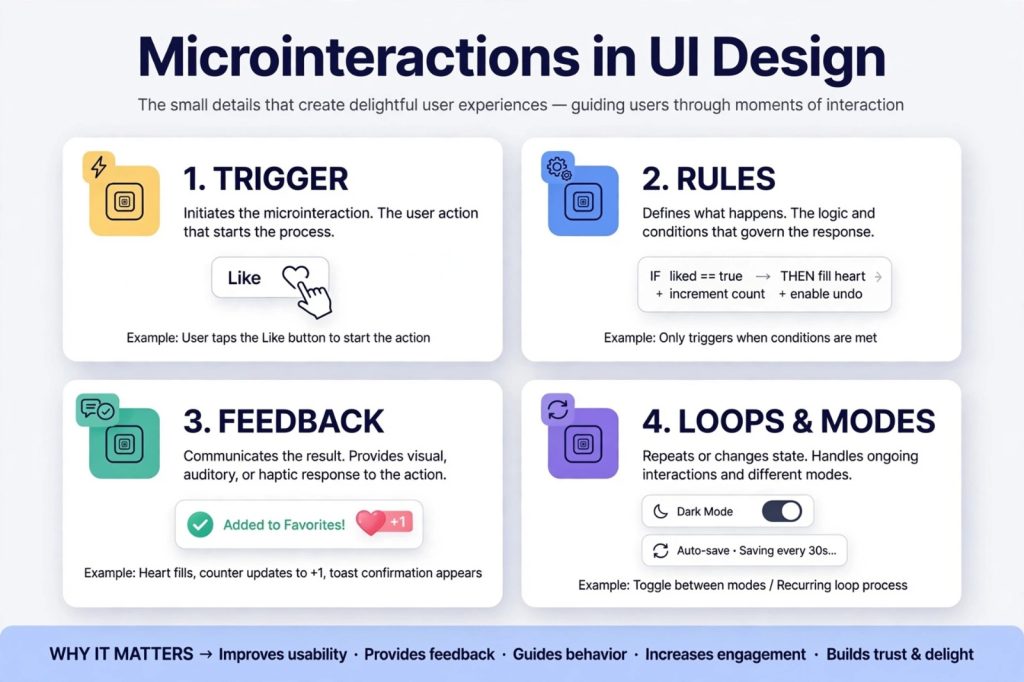
Every microinteraction has four essential parts. Understanding this structure is crucial before you design anything.
1. Trigger
The trigger initiates the microinteraction. It can be a user-initiated trigger like tapping a like button, or a system-initiated trigger like a notification popping up when a new message arrives.
2. Rules
Rules define what happens after the trigger. For example: IF user taps like button THEN fill heart with red color AND increment counter by 1 AND enable undo.
3. Feedback
Feedback is what the user sees, hears, or feels. This is the animation, sound, or haptic vibration that tells the user something happened. This is the most important part of UI animation best practices.
4. Loops and Modes
Loops determine how long the microinteraction lasts or if it repeats. Modes determine if the interaction changes based on context, like a dark mode toggle or an auto-save that happens every 30 seconds.
To understand how to get started with microinteractions in UI design, you must first learn its 4-part structure.
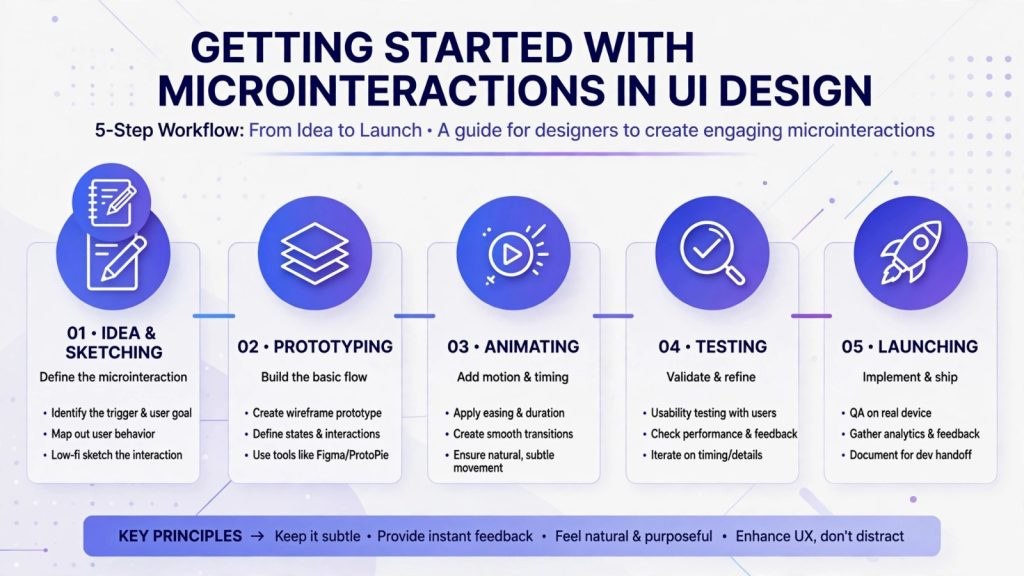
How to Get Started with Microinteractions in UI Design: 5 Practical Steps
Step 1: Start with Function, Not Decoration
Never add animation just to look cool. Ask: What user problem does this solve? A good starting point is form validation. Instead of just showing red text for an error, add a subtle shake animation to the input field. It instantly grabs attention and guides behavior.
Step 2: Use the Right Tools for Beginners
You don’t need to code from scratch to learn. For designers, start with Figma Smart Animate, Principle, or LottieFiles. For developers, Framer Motion and simple CSS transitions are perfect for learning how to get started with microinteractions in UI design.
We use these same tools in our professional Web Development services.
Step 3: Keep it Fast and Subtle (The 200-500ms Rule)
The ideal microinteraction lasts between 200-500ms. It should be subtle and quick. A toggle switch should slide smoothly, not bounce across the entire screen. The goal is to enhance usability, not distract the user from their main task.
For timing and easing, always follow the Material Design guidelines on motion which is the industry standard.
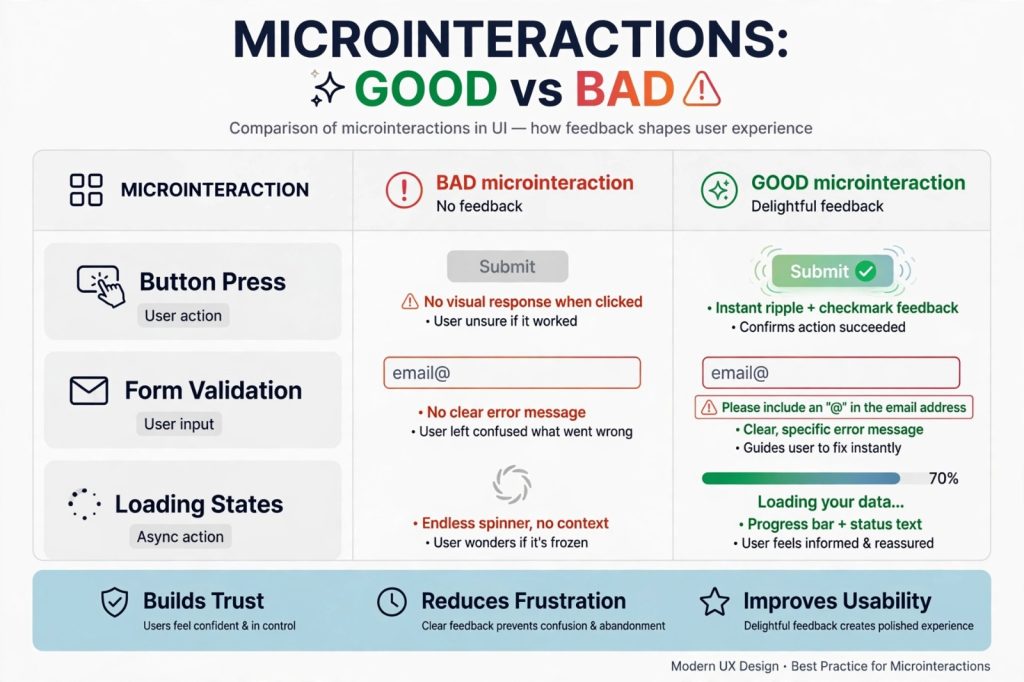
Step 4: Study Good vs Bad Microinteractions Examples
This is where most beginners fail. A bad microinteraction gives no feedback. The user clicks submit and nothing happens, so they click again and submit twice. A good microinteraction confirms the action instantly with a ripple, a checkmark, and a status message.
[ADD IMAGE 3 HERE – Comparison] File: good-vs-bad-microinteractions-comparison.webp Alt: good vs bad microinteractions examples in UI design
Step 5: Test with Real Users
What feels delightful to you might feel annoying to others. Always test your animations with real users. Check if they understand the feedback and if it feels natural.
Best Practices and Common Mistakes to Avoid
To truly master microinteractions, you need to follow proven UX rules. The team at Nielsen Norman Group has extensively researched how small interactions affect user trust.
Many designers searching for how to get started with microinteractions in UI design make the same mistakes.
Here are 4 golden rules:
- Don’t overdo it: Too many animations make your site feel chaotic and slow.
- Maintain consistency: Your like animation and button feedback should work the same everywhere on your site.
- Make it accessible: Always provide a reduced-motion option for users who prefer less animation.
- Design for emotion: A small delight moment, like Mailchimp’s high-five animation after sending a campaign, builds brand love and improves retention.
This is a core part of our professional UI/UX Design process at SSDSOL.
Conclusion: Small Details, Big Experience
Learning how to get started with microinteractions in UI design doesn’t require complex coding.Start small. Pick one button, one form field, and one loading state in your next project and design thoughtful feedback for each.
When done right, these tiny moments transform a functional product into a delightful one that users love to use.
If you need help implementing professional microinteractions, contact System Software Development Solution for custom solutions.